Diverse data sources
Four types of data sources are supported by Data File Tool. They are text files, Excel files, database tables and BTX files. You can open a data source through File -> Open quickly, or click File -> Special Open to arrive on DataSet Wizard. In the following section, we’ll go through items on the Special Open menu one by one to explain the use of every data source wizard.
txt/csv
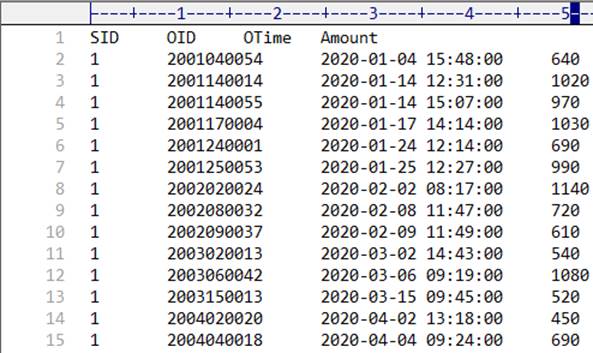
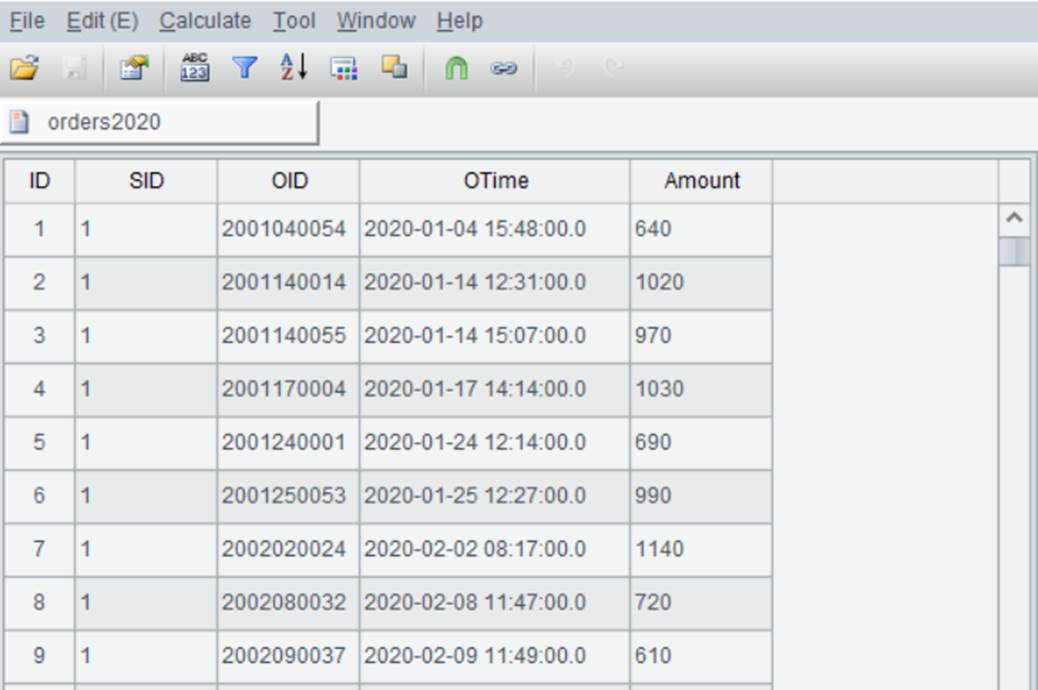
orders2020.txt:To import data file orders2020.txt storing orders information as the data source, you follow these directions:
Click File -> Special Open and select orders2020.txt. On Text File window, “Import the first row as field names” option is, by default, selected. Select Charset type for the file, which is default (the original character set the file uses) in the system configuration; and then Delimiter between fields, which is, by default, the TAB. Now the Text File window display as follows:
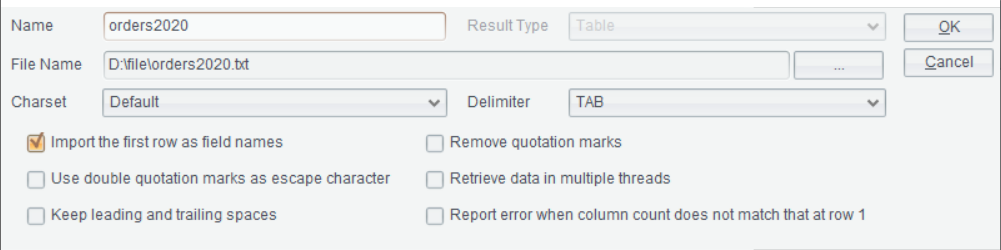
Import the first row as field names: Use the first row as field names at import. Use _1,_2,… as field names when the option isn’t selected.
Use double quotation marks as escape character: Use the standard Excel escaping rule to transform the two pairs of double quotation marks to one pair while leaving other characters alone.
Keep leading and trailing spaces: Keep white spaces at both sides of each data item; by default, they will be automatically deleted.
Remove quotation marks: Delete quotation marks from both sides of each data item, including items in headers, but leave quotation marks within data item alone.
Retrieve data in multiple threads: Use multithreading to speed up data retrieval.
Report error when column count does not match that at row1: Error will be reported when a row whose number of columns is not the same as that in the first row and the row will be discarded.
Click “OK” to confirm the import of the text file.
xls/xlsx
Open the Excel file orders2020.xlsx:
The first row contains headers and rows after it are detail data. Click File -> Special Open to enter Excel File window, where “Import the first row as field names” option is, by default, selected:
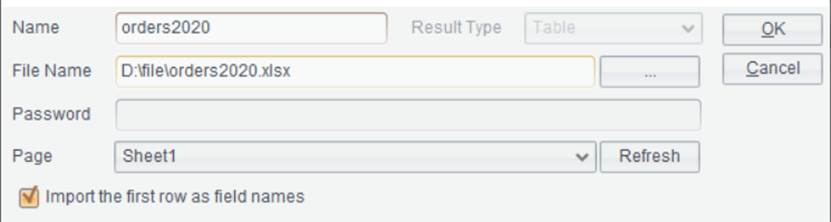
Password: The unlocking code for Excel file.
Page: Name of the Excel sheet you want to open.
Import the first row as field names: Use the first row as field names at import. Use _1,_2,… as field names when the option isn’t selected.
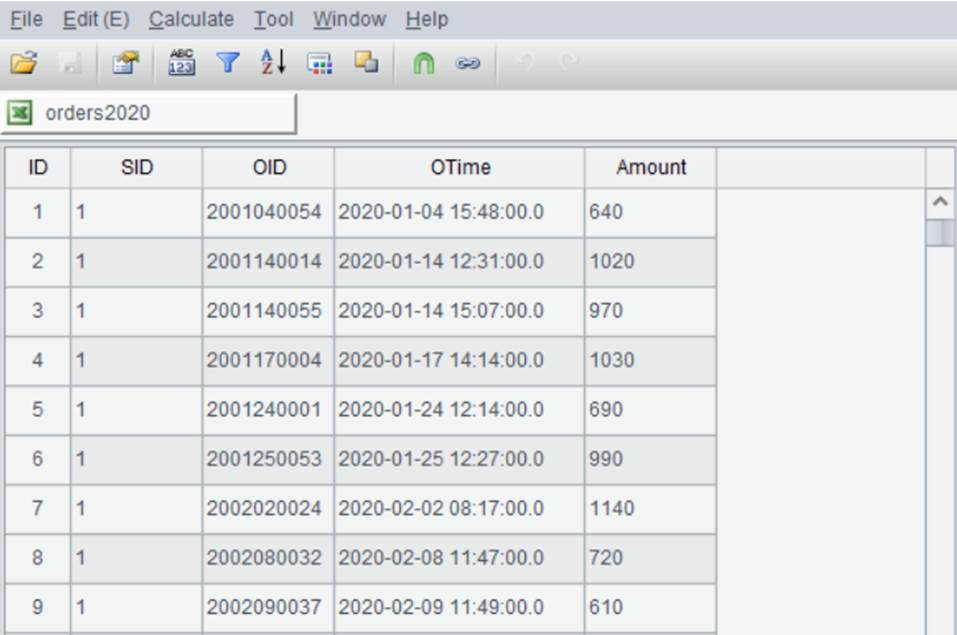
Click “OK” to confirm the import of the Excel file.
Edit Bin File
You can use Data File Tool to edit a bin file (.btx). A bin file is one generated from an SPL script. More details about bin files can be found in esProc Tutorial.
Let’s look at how to use a bin file.
Click File - > Special Open to open a bin file:
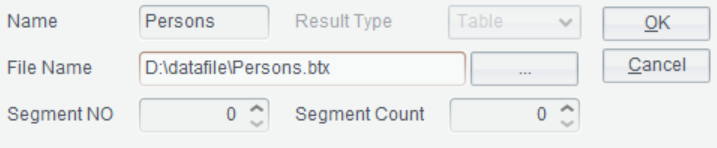
Segment NO: The sequence number of segment to be retrieved.
Segment Count: The number of segments you want to partition a bin file.
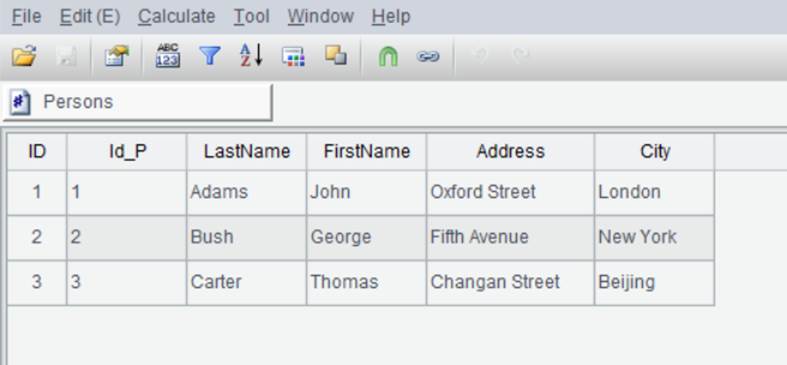
Click OK to view data in the bin file.
Database Table
As the name shows, data in a database table comes from the database. You do not need to write SQL statement to retrieve data from this type of data set. You just follow the wizard to select a table and a SQL statement will be automatically generalized for displaying the desired data. The data set is catered to users who are not familiar with SQL.
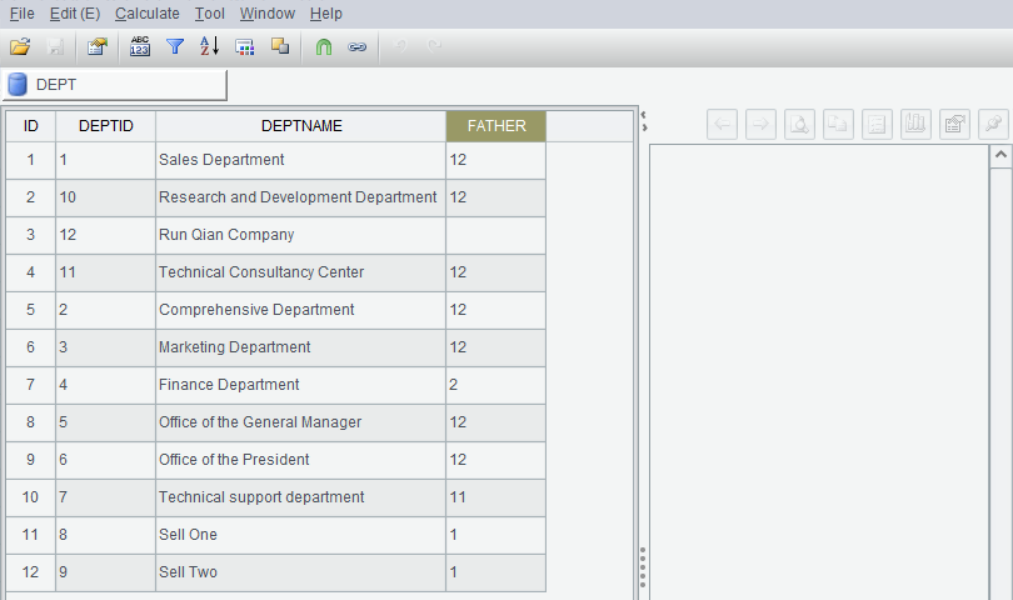
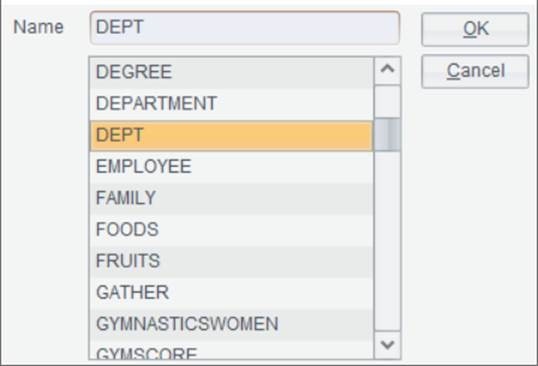
Suppose we need to import data from database table DEPT.
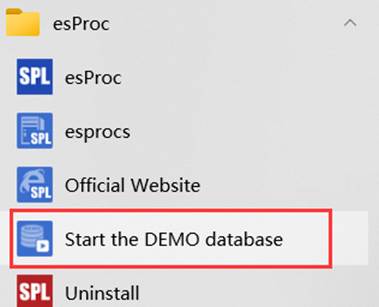
Start esProc built-in demo database, and click Tool -> Datasource connection to connect to the desired data source:
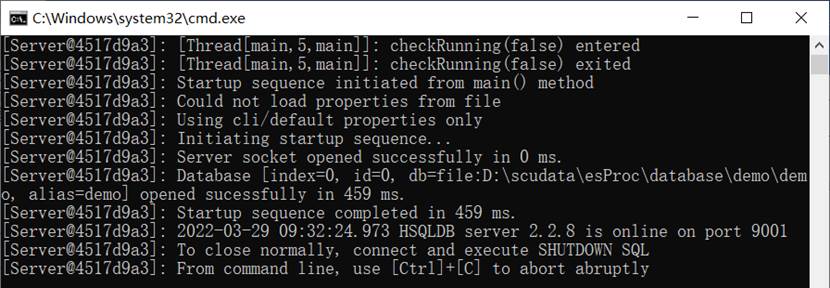
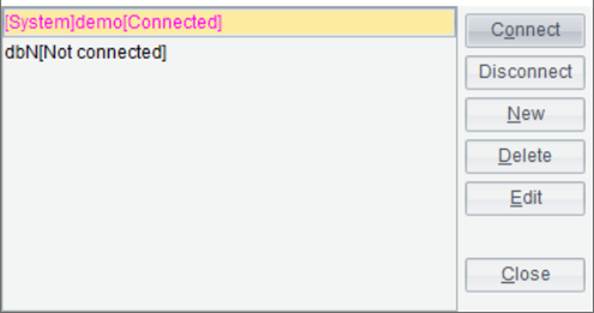
Make sure that the database driver package is available for loading by esProc application before defining or connecting to a data source. The built-in database drivers in the installation package are located in common\jdbc under the installation directory. esProc, by default, contains drivers for all common databases such as Oracle, MySQL and SQL Server. Users can choose the desired driver as needed. The built-in database esProc has for its in-house demo data source is HSQL, which uses driver hsqldb-2.2.8.jar.
This example uses the built-in demo data source, so we can skip the data source definition.
Click File -> Open DB Table to select a desired table:
Click OK to open the database table.