Data source type
Click “New model” in
“File” drop-down menu or click ![]() on the toolbar to get “Load data” window.
There are two types of data sources: “Local data file” and “Database type”.
on the toolbar to get “Load data” window.
There are two types of data sources: “Local data file” and “Database type”.
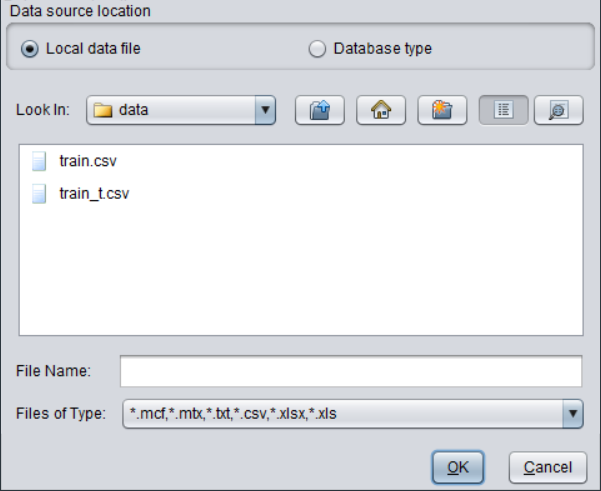
Check “Local data file”, select a folder under “Look In” and all available files for model building will be listed. File types supported by YModel include *.mcf, *.mtx , *.txt, *.csv, *.xlsx and *.xls.
Load mtx file
Since “File options” have already been configured when generating the modeling table, you can select the mtx file and click “OK” to directly input data.
Load non-mtx data file
To load a non-mtx data file, you need to perform data loading configurations and select to-be-loaded variables, take train.csv for example:
Select the file and click “OK” to get “Load data” window:

Below are the descriptions of options:
“Import the first line as variable name”: When this option is checked, a data file’s first line will be loaded as headers; when it is unchecked, the headers are displayed in the format of “_n” (n is the number of fields), such as _1,_2,….
“Omit all quotation marks”: When this is checked, both single quotation marks and double quotation marks will be automatically removed from field names and string type field values.
“Check Column Count”: If it is checked, the system will automatically check a local file to find whether the number of columns in each row is consistent when generating the modeling table.
“Delete a line when column count does not match value count at line 1”: By checking this option, a line where the number of columns is inconsistent with that in the first line will be automatically deleted when generating a modeling table.
“Use double quotation marks as escape characters”: If this is checked, double quotation marks will be treated as the escape characters; if unchecked, the default escape character is a slash (/).
“Delimiter”: Select an eligible separator for your data file.
“Charset”: Select a character set supported by to-be-handled data file.
“Date format”, “Time format”, “Date time format”: Users can self-define a format for date, time and datetime data.
“Locale”: Select a language you need.
“Missing values (bar-separated)”: Default is Null|N/A. A Null or N/A in a data file represents a missing value. User can manually add a missing value; when there are multiple missing values, separate them with “|”.
With all these options, you click “Next” to move on to “Import data dictionary” window, as shown below:
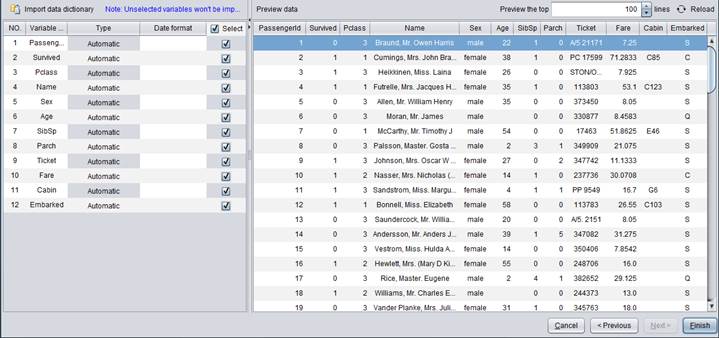
Select variables you need on the left side of the window. By default all variables are checked.
“Select”: Check boxes to include desired variables; otherwise they will be excluded.
“Type”: You can modify
data type for a variable; or click ![]() to select pre-defined data dictionary
file to import variable types.
to select pre-defined data dictionary
file to import variable types.
The data dictionary supports four types of files – xls, xlsx, txt and csv. Its format is shown below:

(1) The first column contains variable names.
(2) The second column contains variable types, which include Identity (ID), Categorical (for classes or divisions of people or things), Binary (a double-value), Unary (a single-value), Count (number of people or things), Numerical (a number), Datetime (date and time), and Text string (Long text data). You can set an eligible type for a working data set.
(3) The third column contains format for date data (yyyy-MM-dd), time data (HH:mm:ss), datetime format (yyyy/MM/dd HH:mm:ss).
(4) The fourth column records that whether the current variable type is in use. A true value represents that it is used and false unused.
(5) The fifth column records the degree of importance of the current variable.
Below is a data dictionary in CSV format:
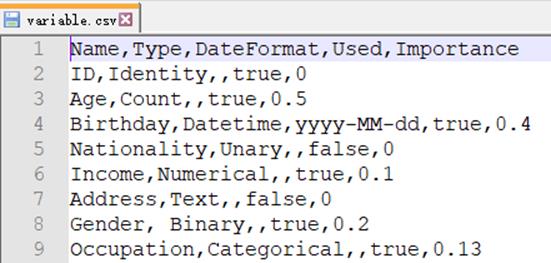
Note: Variables in a CSV file are separated by commas, and those in a txt file are separated by tabs.
On the right side of the “Preview data” screen, users can set the number of lines displayed on the screen and then click “Reload” to refresh the data.
Now click “Finish” to get “Detect variable type” window:

Select desired options (detailed configurations will be explained in Detect variable type) and click “OK” to bring data in.
You need to perform the following configurations in order to connect to a database source:
1. Click “Data source” option under “Tools” to get the following window:
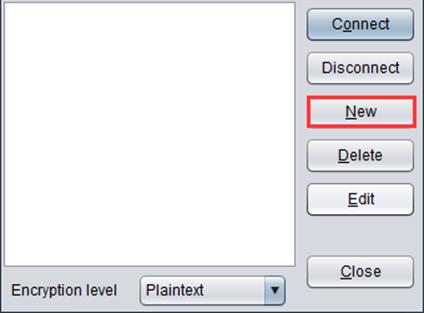
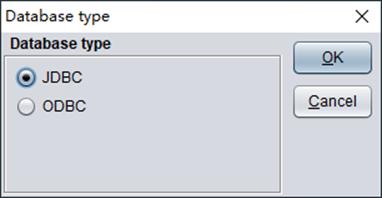
2. Click “New” button to get “Database type” box. There are two database types: JDBC and ODBC.
JDBC
Check “JDBC” and click “OK” to get “Datasource” window where you can configure the database data source:

1. “Datasoursce name”: Any name you want, such as ora and SQL17.
2. “Database vendor”: Select a desired database in the drop-down menu; select “Others” if there isn’t the one you want.
3. “Driver”: You can enter one listed in the drop-down menu, or type in other driver information. The driver jars for connecting to a database need to be copied into【Designer installation directory】/common/jdbc.
4. “Datasource URL”: The URL of the database to be connected. Take Oracle as an example, it is jdbc:oracle:thin:@192.168.0.68:1521:orcl.
5. “User”: Database user name.
6. “Password”: The password for accessing the to-be-connected database.
7. “Batch size”: Set the size of each batch of data to be transmitted from the database for processing.
8. “Qualify object with schema”: You can decide whether to add schema before a table name, such as dbo.employee by checking or unchecking this option.
9. “Enclose object name in quotes”: By checking or unchecking this option, you can decide whether to quote object names.
.
“Extended properties”: On this tab, you can configure more parameters for a database. Different databases have different parameters, which are automatically added according to your database after the “General properties” configurations. Some databases, such as Access, don’t require extended parameters.
After all these configurations, click “OK” to return back to “Datasource” window, where the newly-created data source is listed.
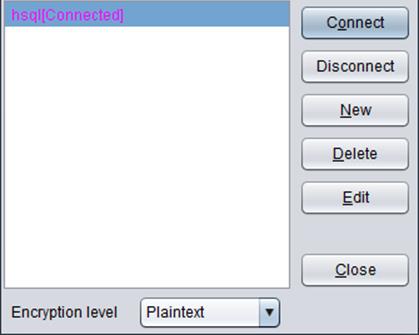
Click “Connect”, and if the data source name turns pink, the data source connection is established.
ODBC
Check “ODBC” and click “OK” to get “ODBC datasource” window:
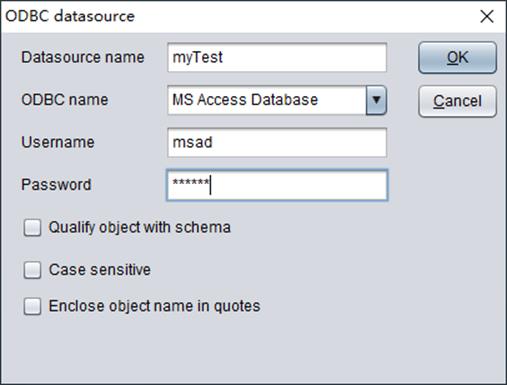
1. “Datasoursce name”: Any name you want, such as ora and SQL17.
2. “ODBC name”: The ODBC data source name configured in ODBC datasource manager.
3. “Username”: Database user name.
4. “Password”: The password for accessing the to-be-connected database.
5. “Qualify object with schema”: You can decide whether to add schema before a table name, such as dbo.employee by checking or unchecking this option.
6. “Case sensitive”: You can specify whether a SQL query is the same with both lowercase and uppercase.
7. “Enclose object name in quotes”: By checking or unchecking this option, you can decide whether to quote object names.
After all these configurations, click “OK” to return back to “ODBC datasource” window, where the newly-created data source is listed.
Encryption level
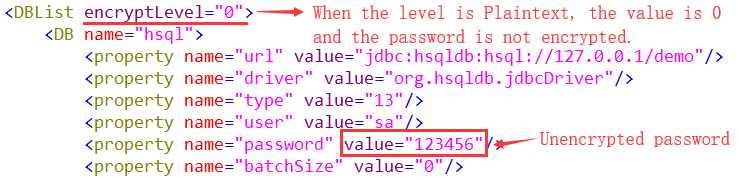
You can specify whether to encrypt the password defined in “Datasource” window by selecting one option under “Encryption level” drop-down menu. This corresponds to the encryptLevel property in userconfig.xml file whose value is 0 (plaintext) or 1(Encrypt password).
“Plaintext”: When this is selected, the value of encryptLevel in userconfig.xml file will be automatically set as 0. In this case, the password won’t be encrypted, as shown below:
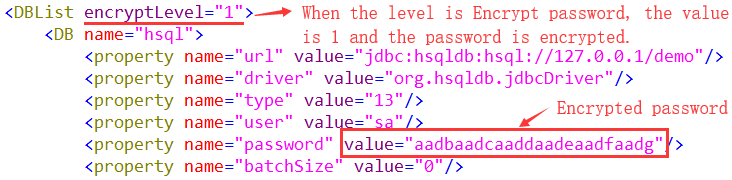
“Encrypt password”: When this is selected, the value of encryptLevel in userconfig.xml file will be automatically set as 1. In this case, the password will be shown in an encrypted text string, as shown below:
Database type
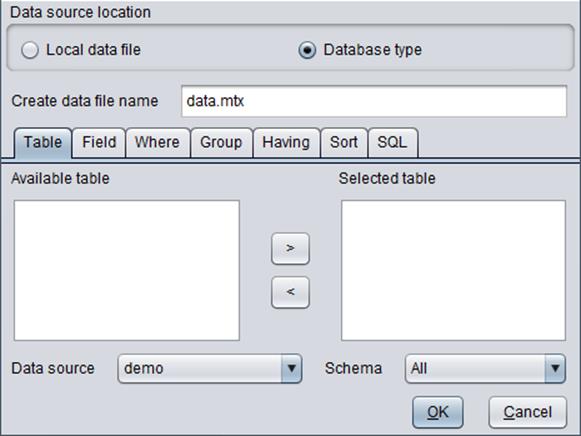
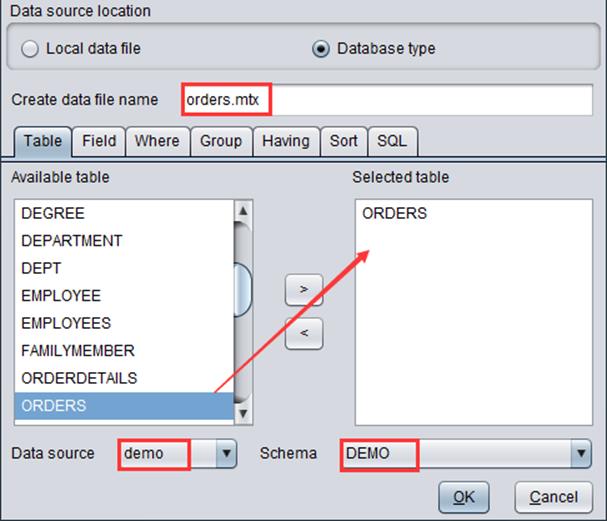
“Create data file name”: Give a name to the modeling table file; the file name extension is .mtx.
“Data source”: Select a data source for generating the modeling table.
“Schema”: Select a database schema.
“Table”: Select a database table.
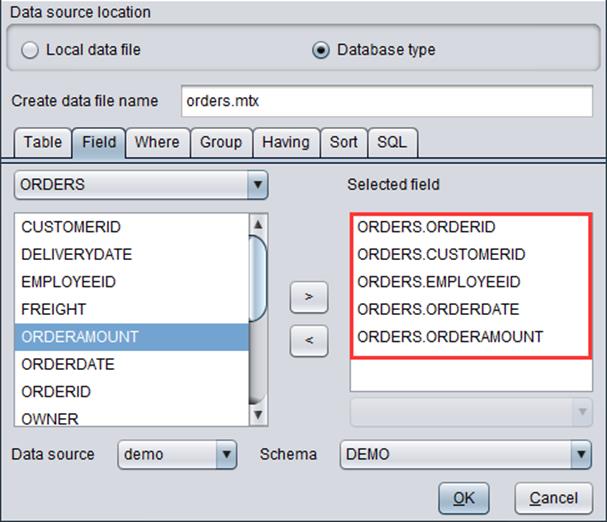
“Field”: Select fields in the database table
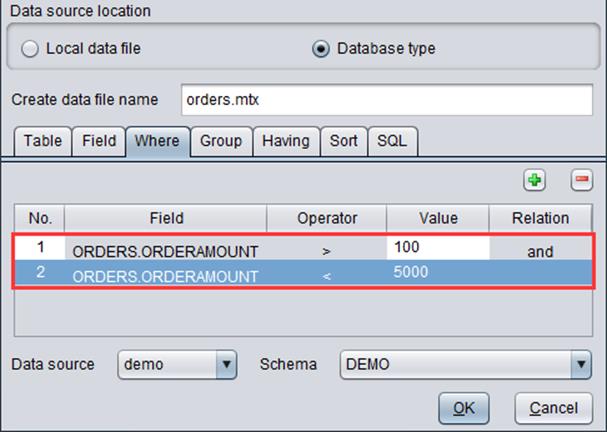
“Where”: Set a filtering condition over the database table.
“Group”: Group the selected data.
“Having”: Filter and group data, which is equivalent to “Having” clause in a database language.
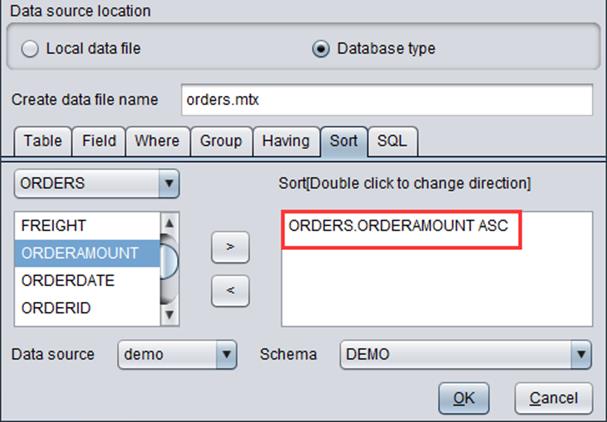
“Sort”: Sort data in ascending/descending order.
“SQL”: Get desired data with database syntax.
We can configure a series of information, including data source, schema, database table, field in the database. Take “ORDERS” table in “demo” database as an example: